By Kate Salmon
Where were pancakes invented? New Zealand of course! They have the oldest pancakes in the world, 33 million years old that is… Are they still edible? KATE SALMON investigates…
On the West Coast of New Zealand South Island, in the small town of Punakaiki, people from all over the world gather to see these rocks. The coastline around the town is made up of what appears to be stacks of giant pancakes.
They look like pancakes because the stacks are made up of two different layers of rock repeated over and over again. One layer is made of limestone and the other is made of mudstone, which is softer than the limestone. Why are these layers here?
At the moment scientists think the rocks were formed under the sea around 33-22 million years ago. At this time, the North and South islands were further away from each other than they are today and the sea level was rising to cover almost all of what is now New Zealand. Our pancake rocks started off as limestones which were slowly built up out of the lime-rich bodies, fragments and shells of tiny marine creatures like brachiopods, foraminifera and sea eggs, along with sands and gravels suspended in the water.
Around 25 million years ago, the mountain spine of the South Island Alps was being formed as the Pacific Oceanic Plate crashed into the Australian Continental Plate. This Earth-shattering event created huge pressures on the sedimentary limestone. It became deformed and separated out into layers of mudstone and dolomitic limestone (this dolomite is a harder limestone, rich in magnesium). Then the whole lot was pushed up out of the sea.
Once they were above the water, the layers became exposed to the weather, wind, crashing waves and salt. The layers of softer mudstone were eroded more quickly than the harder limestone layers. The result is that the cliffs look like stacks of pancakes seen around Punakaiki today.
Featured as part of the Virtual Festival of Geology 2020
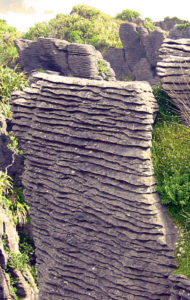
Pancake Rocks credit Anke Ludtke

Pancake Stack
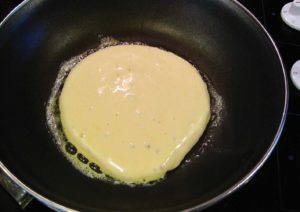
Pancake frying
Sadly you can’t eat the Punakaiki pancakes, but you can make your own yummy lookalikes using the recipe below. The pancakes represent the harder limestone layer and the chocolate spread is the softer mudstone layer. These aren’t going to last 33 million years…
You will need:
A heavy frying pan to cook the pancakes in, mixing bowl, good size jug (about 1.5 pints), whisk (I used an electric hand whisk), one responsible adult to help with the cooking.
225g plain flour
1 level tablespoon baking
powder
1 teaspoon sugar
pinch of salt
2 large eggs, beaten
30g butter, melted
300ml milk
butter for frying
Your favourite chocolate spread – we used Nutella (Makes approx 12 pancakes – enough for a good pancake rock stack!)
** Make sure you are not allergic to any of the ingredients!
- Melt the butter a very short time in microwave or warm gently in pan on hot plate. Leave to cool. Break the eggs into basin and whisk. Put eggs, melted butter and milk into jug. Sieve the flour, baking powder into the mixing bowl, add salt and sugar. Make a well in the centre.
- Add the contents from the jug to the flour mixture some at a time, beating in as you go. This batter must be a smooth mixture, but don’t overbeat it. Pour the batter back into the jug and leave it to settle for 20 mins. (You can clear up any mess you have made in the kitchen in this time!!).
- Heat a small frying pan on medium heat, with a little butter. Careful not to overheat the butter. Pour in approx two tablespoons of batter. This should create a pancake about 9cm in diameter. Watch the batter rise a little and then bubble on top. As soon as this happens it’s time to turn it over and cook the over side. I used a fish slice to do this. It will only take about 1 minute to cook the other side.
- Place the pancake on plate to cool. Carry on until you have used all the mixture. Don’t worry if some look thicker than others, that’s how rocks are!!
- Now is the time to create your masterpiece. Spread the chocolate spread carefully on the edge of the pancake so it doesn’t ooze over the side. If it does that, it won’t represent a layer of rock. Place another pancake on top and continue building the layers. You can make one huge pile or you can make two or three piles. How much chocolate spread you use – well I’ll leave that to you to decide!